Friday, May 1, 2015

DONT WEAR IT SIT ON IT!


It's been a while since my last post, well actually a long while! I'm back with an adorable and thrifty way to recover your dining chairs.
Last year I visited family in Texas, and while I was there my daughter in law wanted to do a little makeover on her large dining room table and 8 chairs. With 5 kids under her belt, the table had some wear but that's always a good thing, it means that family is still managing to gather around the table in this complicated time we live in.
Everyone knows that a dining table is not just for eating. This particular  table has seen plenty of little feet with and without shoes on those chair cushions and some of those feet have become quite adult size!  Not to mention the moving , those kids moved that table and chairs among a zillion other things more in 3 years than any one I know, and thank the good Lord they are settled in now!

An executive decision was made, and my daughter in law and I decided to give it a go! I assured her that it would not be costly and being the queen of thrift ... I pretty much could guarantee it! 

After contemplating the dining room, we both decided that a couple of walls needed some help too, so we decided to add a burst of raspberry to a couple of walls, and I am talking raspberry's blended with a touch of cream  and  poured over cheese cake so smooth and creamy not to mention  happy and oh so  bright! What a mood lifter! Of course that would have to wait until later.
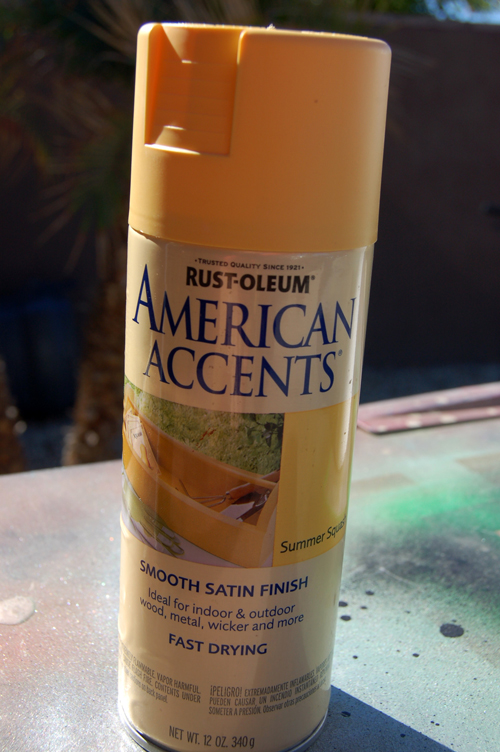
 We gave the table top an up doo too.  We stayed with the original color which was black and added a shine and good top coat..... just in case .

Then.... the fun began! Fabric hunting!
My daughter in law quickly questioned me on...........
What colors?
What patterns?
Where do you start?
Shirts?
Skirts?
Floral?
Stripe?
Hounds tooth?
Vintage?
Modern?
What to do! 
I told her it would all come together as we started the hunt... and that is exactly what we did.
She took me to a super cool thrift store that was huge and had a ton of clothing, both vintage and modern. We had the overall colors in mind (black, grey, raspberry, yellow, gold, purple, and green give or take a few more...)  and  we just started on opposite ends and grabbed some clothes.
NOTE:
Its important to make sure you know the measurement of your chair seat, and that you find clothing that will give you plenty of fabric for  for folding under the seat to staple.
 Also bear in mind that stretchy and hardy fabrics are great to choose from. I am not saying that you can't do a chair or two in something you absolutely love that is neither of the above, But it just makes your life easier to choose wisely. After all that hard work, you don't want your cushions looking like crap after a few months. If your fortunate to find a blanket or curtain or bedding that is perfect ... I would say .... SCORE!  
This is always more fun to do with someone you like....   and trust... their taste that is.
Once we gathered a bunch of clothing and when I say that, I mean once there was no room for a single shirt left in the cart, we looked at the textures, colors, and designs and started putting together our theme. Keeping some and discarding others, now this did not happen in 5 minutes. It takes time and trial and error, but don't get discouraged a plan always comes through! She had alot of chairs so that gave her the option of diversity, which is exactly what she chose. Truthfully.... we went back a couple of times.But once she decided on eclectic I ran with it!

We disassembled the chairs with the help of my Son who proved to be quite handy with the screwdriver. In fact he was so precise in speed and agility,we had to question if he wasn't moon lighting as a furniture builder. He was so fast we hired him to put the chairs back together! 

Once the seats and upper parts of the chairs were off we marked them so we wouldn't mix up the chairs with the seats and then we removed the old fabric and staples.
I could see the apprehension in Tawny's eyes as she grabbed her marker and scissors eagerly awaiting instruction. This was after all, her maiden voyage into the world of sewing ... well more like upholstering.


We laid out our chosen decor piece by piece and picked the very first fabric to start... I believe it was the floral skirt but I cant remember now.


We placed the seat onto the first piece of clothing and situated it in line with the best part of the pattern. This is what you will want to do if the pattern is geometric striped or has a multiple of designs in different angles on the clothing.  You would be surprised how just an angle of the fabric can change a look once it's on the cushion.
We traced it  and then cut it out leaving about a good 5 inches all the way around for tucking under and stapling ( this is why when you are picking out your clothes you want to allow for that 5 to 6 inch excess).  We pulled the fabric  tight on each corner first and she put the first few stables in. We just worked our way around pulling the fabric tight and making sure there were no pleats, unless you want pleats but that's a whole different blog. So its more like Pull a corner and staple, pull the opposite corner tight and staple then the 3rd corner and then the 4th corner then you just work the in between fabric till you have it all stapled !

My photos are not necessarily in order all the time that would explain how the raspberry cushion instantly turned into the floral cushion below, I would like to say I was that fast, but ..... I'm just not. 


My oldest granddaughter tried her hand at the job, well when she wasn't photo bombing that is.....
Didn't she do a great job?


She looked like she couldn't believe she actually did it!
And she is a natural it turned out great!

 Tawny turned into an upholstering monster, she just could not get them done fast enough. 


 We would stand back  and marvel at the beauty of each one done,... just for a minute or two before contemplating the next one. I think we may have beckoned a neighbor or two well maybe just a neighbor, I don't think they knew that many then. Did I  mention the snapshots with my phone camera  to send to all her sisters?


One by one they all got done, and what a difference!


The Table looks beautiful!


And even more beautiful once the Raspberry wall joined the party!
I am sorry that I don't have a before photo ..... but trust me, this was quite the redo!

 You know what the  best part of doing this is? Well maybe not the best part..... that was spending time with all my beautiful kids in Texas , so the next best part would be receiving the photos of Tawny's projects she took on .....after I came home, She is well on her way to becoming an independent house designer! And that quite frankly is what I aspire all women to be!
Happy  Remodeling Ladies even if it is just a shirt to a seat!

Saturday, April 12, 2014


CLEANING OUT YOUR HARD DRIVE


This morning I decided I would sit at my computer and get rid of the files that has been crowding out my hard drive. As I pillaged through them I ran across a lot of folders…. I mean a lot.  In opening these folders, properly labeled of course, or so I thought, I found that some were empty, mmmm… wondered for a second why and then oh well, click, delete, easy.  There were quite a few that had content but could not receive access to open, and because I don’t have a degree in computers, it didn’t matter what I tried it just wouldn’t open or delete, so I left those alone.  Then there were the folders that clearly had purpose but after looking through them again, I realized  they just didn’t have any reason to be there so with a quick click of the finger…. click, goodbye!  For A few I created a new folder and joined them together, just for the sake of my eye, less clutter.  On and On I worked, restructuring my artificial intelligent partner in crime… my computer. It is a small reflection of my own brain, use 10% of it, and the other 90% to store all the crap!!

And then I ran across this email received from a disgruntled  acquaintance I had recently been honest with  a few years ago. Obviously I had saved it for a reason here it goes:


  THE MUCH CIRCULATED BURNT BISCUIT STORY FROM THE INTERNET.


When I was a kid, my mom would make breakfast food for dinner every now and then. And I remember one night in particular when she had made breakfast after a long, hard day at work.

On that evening so long ago, my mom placed a plate of eggs, sausage and extremely burned biscuits in front of my dad.  I remember waiting to see if anyone noticed!  Yet all my dad did was reach for his biscuit, smile at my mom and ask me how my day was at school.  I don't remember what I told him that night, but I do remember watching him smear butter and jelly on that biscuit and eat every bite!  When I got up from the table that evening, I remember hearing my mom apologize to my dad for burning the biscuits.  And I'll never forget what he said: "Honey, I love burned biscuits." Later that night, I went to kiss Daddy good night and I asked him if he really liked his biscuits burned.  He wrapped me in his arms and said, "Your mamma put in a hard day at work today and she's real tired. And besides – a little burnt biscuit never hurt anyone!"


You know, life is full of imperfect things. And imperfect people.  I'm not the best at hardly anything, and
 I forget birthdays and anniversaries, and other things just like everyone else.

What I've learned over the years is that - learning to accept each other's faults and choosing to celebrate each other's differences - is one of the most important keys to creating a healthy, growing, and lasting relationship.  That's my prayer for you today. That you will learn to take the good, the bad, and the difficult
parts of your life and lay them at the feet of God.

Because in the end, He's the only One who will be able to give you a relationship where a burned biscuit isn't a deal-breaker!  We could extend this to any relationship.  In fact, understanding is the base of any relationship, be it a husband-wife or parent-child or friendship!

"Don't put the key to your happiness in someone else's pocket - keep it in your own." So… please pass me
 a biscuit, and yes, the burned one will do just fine!  And please pass this along to someone who has enriched your life... I just did.  Life is too short to wake up with regrets… Love the people who treat you right and forget about the ones who don't.

The end.


Call me dense or naive, but I remember not understanding at all why I would receive this? It’s kind of nice, but not, kind of tolerant, but not… oh the confusion! So I sent it to a confidant of mine, one I knew I could trust for an honest opinion and this is what my confidant replied back to her:

 Nice burned biscuit story, however daddy lied to mommy about loving the burned biscuits. I know lying is always okay just to spare feelings...what a joke! Obviously you feel the need to keep sending crap and passive aggressive messages just to make yourself feel justified in all your actions. The Bi-Polar story was so inspiring though, one paragraph talking about accepting and loving through differences down to the end on forgetting those who don’t treat you well. I know life is all about how we feel and who makes us happy...Forget about the people who actually care enough to let you know the truth. Maybe you should just stick with the ones who don’t care enough to say what they are actually feeling and thinking? BTW please lose my contact info, all of the inspiring mail is almost too much to handle


When I read the response it was clear to me how messed up that burnt biscuit story really was. Sad of course that I didn’t have the clarity to respond in that matter, but happy to know I absorbed the truth in it and would in the future. 

As Christians we are to speak the truth in love, not make excuses for lying and being manipulative. Lets all try our best to keep it real, and take direction from the most capable psychiatrist of all….Jesus Christ.


Tuesday, November 27, 2012

THANKFULNESS

THANKFULNESS

My November blog is going to be a writing of Thankfulness.

I live in an open neighborhood in the Desert where the houses are still semi scattered although they are growing closer together each year, this is because I live in a semi small City that was founded in 1964, and it has grown over the last 40 years, with the exception of a  huge decrease of growth over the last 4 years. This City is in a State that stills holds true for the most part Non Liberal views.  This fact makes me happy.
It is my right to not be Liberal, just as it is others rights to want to be Liberal.
This too, makes me happy.
My State of course is combined with many other States that makes up the United States of America.
This also makes me happy.
And although my Country seems to be tossed to and fro with every Wind of Doctrine, I am still very happy to be a part of it.
Evil abides in every corner as it should.
But Grace and Mercy and Love from our God also abides in every corner.
I am in Gods corner.
This makes me more than happy, this fact makes me Thankful and in awe of his Almighty Presence, and his abiding Longsuffering so no one should perish.
I am blessed beyond measure, in this little corner I live in.
This last 4 years has been a roller coaster.
Death has taken it's toll on many we know and love dearly.
Cancer has struck in our family with no mercy.
Family members have lost their homes.
Finances have been tight.
Loved ones have flew the nest and moved across the Country.
But.................
Death has remained afar for many of our loved ones.
Cancer has spared some of our loved ones.
Family members have managed to keep their homes.
Finances have managed to keep us afloat.
And many of our loved ones still live down the street.
So I am going to choose Thankfulness once again.
I pray you do too.
Ruthy.

Tuesday, October 30, 2012

DRESS UP A HEAD INSTEAD!


I have a seamstress stand, the ones that you can use to measure for creating and altering dress
 patterns. I do believe I used it twice for that actually. Well, it just stands there hidden in the corner year after year. This year I thought I would drag it out and put a cloak on it, only problem was ..... no head.  I was in Hobby Lobby ( go figure) and there I saw it, a Styrofoam head. My daughter said "grab it and I'll paint a face on it", she will look really awesome"! She's the artist by the way.  Well she got busy, and there it was a few days before Halloween and it never got painted, so my grand daughter and I decided to have a go at it.
It didn't turn out half bad!  So give this one a try sometime for a Halloween decoration! You don't need to be an artist for this one, and in 12 short steps you can have a creepy member in the home!

Gather your Supplies:


A Styrofoam head:
 

Spray paint:


I used the fleshy yellow first then the shiny gold on top. To be honest,
tan was my first choice but I couldn't get the tip to work, things are made so cheap now days, that paint was only 10 years old......


Nail Polish ( Red, Pink and White )
We always have those colors in our cabinet right?


Make up:Rouge, Lip Liner, Pink and White Eye Shadow
Really... just use your own colors


Fake Eye Lashes and Eye Lash Glue:


 Face Art Decos:
 
 I used gold ones but you can use any sparkling ones you can find. They are
usually at Walmart or Walgreens. Get wild with it!


Plastic Eyes:


 you can get these at Hobby Lobby, Walmart, or Michaels. I tried to post cooler looking eyes but I forgot to take a photo first, so this is what the internet brought!


A Wig of your choice.
 
Step One:

 Spray paint your Head!


Step Two:

Add the second coat with the Gold Paint
Don't go heavy with the gold just lightly "Enhance" the face!


Step Three:


Use your Nail Polish and Paint the cheeks.
You can also out line the cheek first instead of free handing it... I wish I would have.


Step Four:

After the nail polish dries, use the eye shadow or cheek powder to blend the cheek color:


Step Five:

Get your black craft paint and place it over the lid of both eyes.
A small artist brush, I imagine would work great, I would imagine it because I used my finger.


It should look like the photo below.
If.... you used your finger.


Step Six:
 
Add some white eye shadow over the top of the black where the brow would be.
Come to think of it... that could have worked as the artist brush. Oh well.


Step Seven:

Now place the white nail polish over the top to seal it:


Step Eight:

Get your red lip liner and draw out the mouth.
If you don't have an 8 year old little girl available... just do it yourself.


Now it should resemble the photo below.
You can make the mouth as big or small as you like, my grand daughter likes it small as you can see!
I filled it in a little bigger later! Big mouths are my thing.


Step Nine

Fill in the mouth area with the lip pencil.


Now it should resemble the photo below.
She did a pretty good job!


Step Ten

Now put the Red Nail Polish over the lips to seal it.


Now the lips should resemble the photo below.


Step Eleven:

Apply the eye lashes and the Eye Decos  with the eye lash glue.


Now your face should resemble the photo below.


Step Twelve:

Hot glue the Plastic Eye Balls on.
After your fingers are blistered , place on the Wig.
 
 
I used medium green eyes, but you can use what ever ones you prefer. I also placed mine out to the sides for a creepier look.
I then smoothed out her features a little and brushed her face with the face powder....and widened her lips shhhh don't tell her.


She should now look like the photo below, well kind of ... you know what I mean.


This is what I did with her!
She was at the top of the spiral staircase, the stairs  the "Little Ones" use?
 Really spooky looking at night... not such a good idea, her legs are metal  so it really hurts to stub your toe!


So I moved her downstairs next to the window!.


She was super cool looking with her broken neck!
 But that brought back some bad memories.... it isn't cool at all to have a broken neck.
 

So I sent her to the Chiropractor !
Here's a close up! She loves the spider, the two are inseparable now.. I shall store them together.


Just think, if you started in January you could have a house full of these creepy things by Halloween....
 But.... who would want that?
 
Oh wait..... I can think of one!
 

Till Next Time.....
Creepy Crafting to you all!